First Experience for Arduino
Arduino初体验
I knew there was such a thing as Arduino at RubyConfChina in 2012. A year later, I suddenly remembered this thing - I thought it was interesting, so why not give it a try? This article is a record of my first experience with Arduino, not really detailed, but just depicts the feeling of I can play with electronic components even if I am a software guy.
About the motherboard, I searched on Taobao and Amazon, and there are quite a lot of Arduino boards. For convenience's sake, I ended up buying the Arduino Electronic Design Guide, a kit that accompanies the book, with each component packaged separately and labeled.
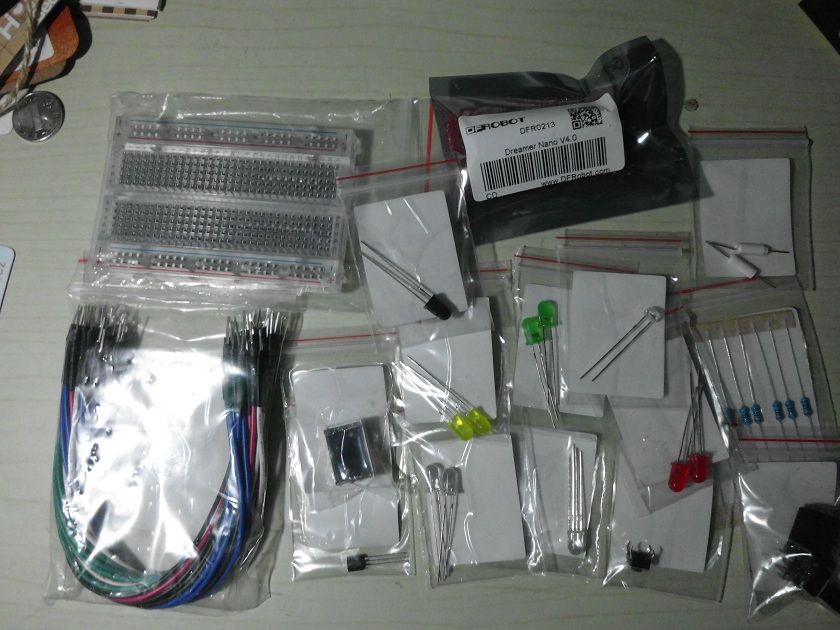
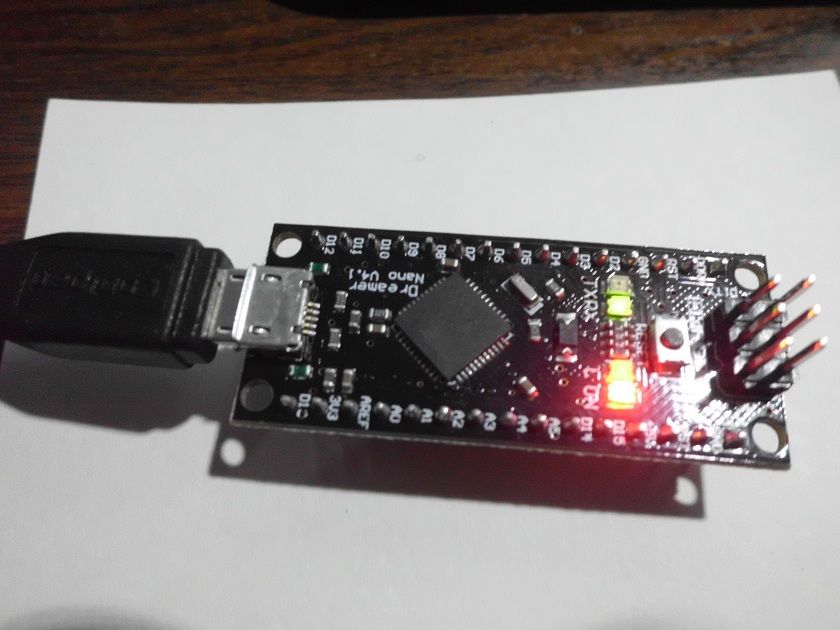
The board in this kit is the Dreamder Nano from DFRobot, which is an Arduino Leonardo compatible board.
Development environment
Under the Downloads tab on Arduino's official website you can see links to download the IDE, with corresponding versions for Linux/Windows/Mac OS. Given that the guide I read was about developing on Windows, I used Win7 for my following operations.
There are several folders in the zip archive: drivers, examples, and libraries.
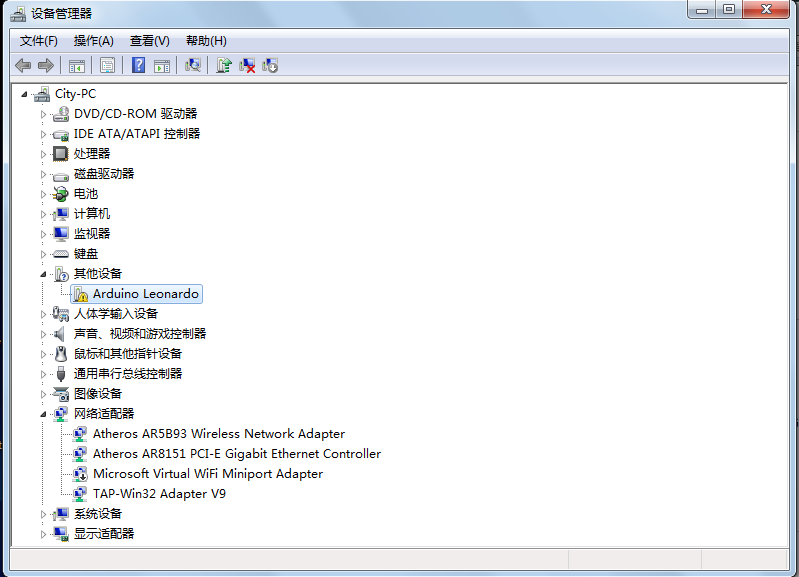
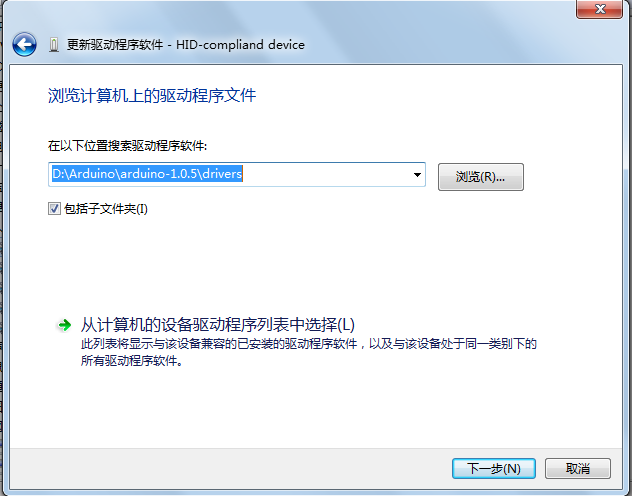
After connecting the Nano to the computer with the USB cable, Windows does not install the hardware driver properly; we need to install it manually by specifying the driver path to the drivers folder just after unpacking.
Hello World for Arduino
The strobe of the LED is the Hello World for Arduino. Well, to be honest, after I connected the circuit, the light was already flashing, and it came with ~~ crazy ~~ flashing, so let's change the flashing frequency.
void setup()
{
  pinMode(7, OUTPUT); //I used pin 7
}

void loop()
{
  digitalWrite(7, HIGH).
  delay(2000).
  digitalWrite(7, LOW).
  delay(2000).
}
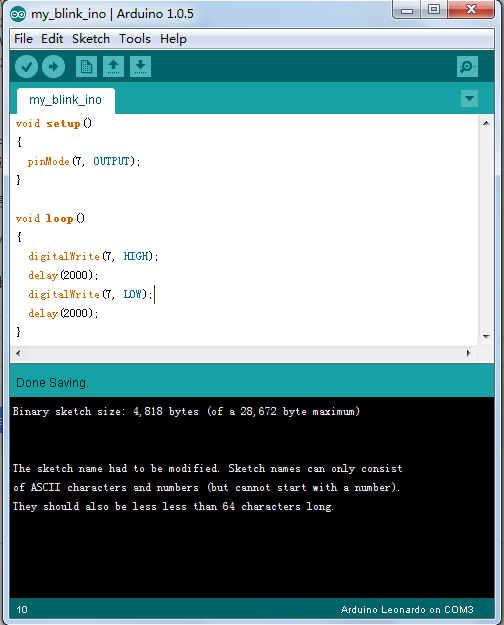
There are 4 lines of code in loop(). Let me explain what's happening. A high voltage is given to Pin 7, delayed by 2 seconds, then a low voltage is given to Pin 7, delayed by 2 seconds again. The effect of the loop is that the LEDs will light up for two seconds at two-second intervals. After saving this code in the IDE, you can click Upload to burn it to the board; before that, it is better to Verify the code. It can not be uploaded successfully, if there is a problem with your code.
This is a screenshot of the IDE:
The effect is this, ahem, JPG images will play an animation, ~~ please fake up LED flashing in your mind ~~ . In addition, the USB output is 5V, so the LEDs are connected in series with a 330-ohm resistor.
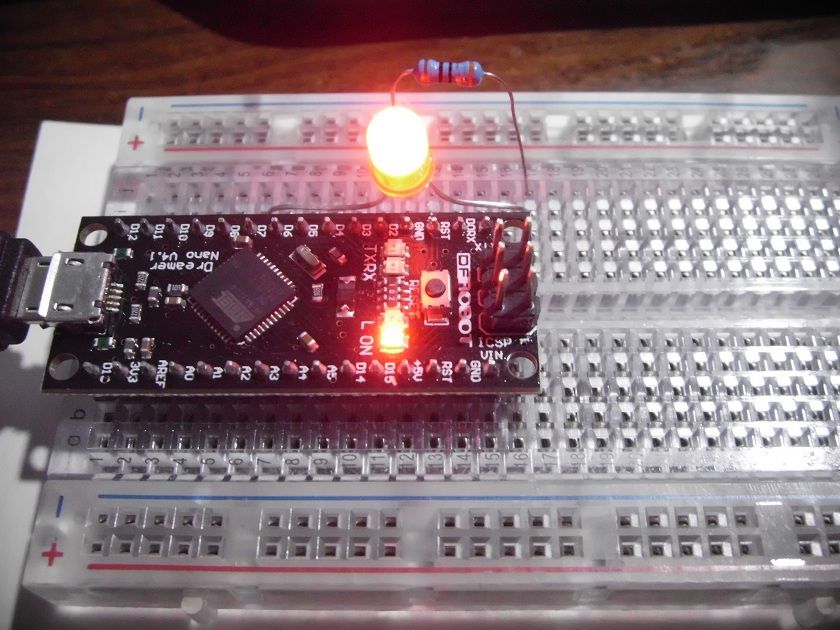
P.S The Arduino board has a resettable fuse that will automatically disconnect when the current reaches 500mA to protect the computer USB interface.
Next time I'm going to learn how to use Ruby to hack Arduino.